Use Git Worktree to Run Multiple Instances of Claude Code
Unleash Your AI Vibe Coding Army: A Practical Guide to Using git worktree for Parallel Tasks by running multiple instances of AI assistants
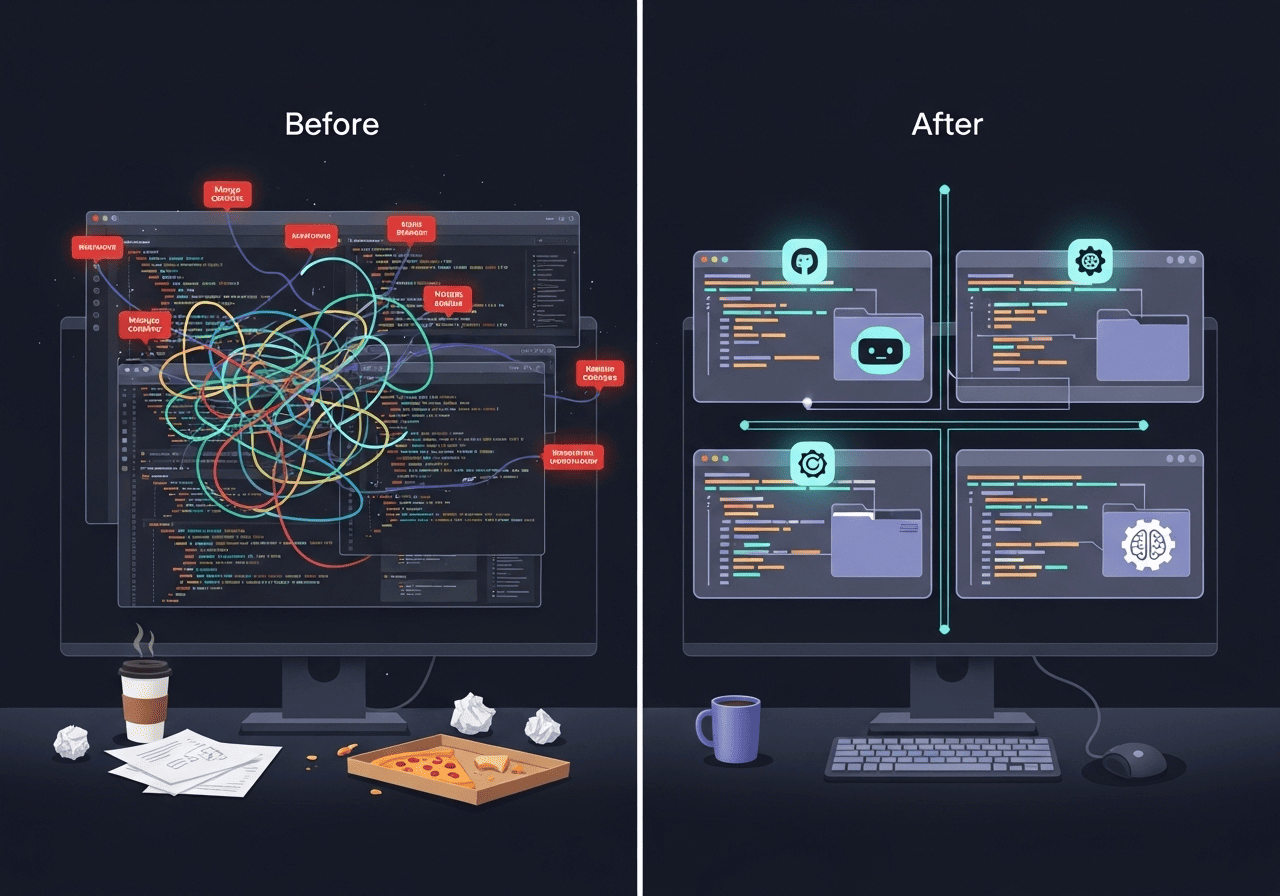
Want to run multiple instances of Claude Code, Gemini, or the latest Cursor CLI without your changes clashing? If you try to run these tasks in the same branch, you’ll end up with conflicting changes and a messy commit history.
Think of how a human development team works: each developer tackles a task on their
own machine, in their own “branch.” We can mimic this powerful workflow by giving
each AI assistant its own isolated branch to work in. The perfect tool for this is
git worktree.
What is git worktree?
Simply put, git worktree lets you have multiple working directories linked to a single Git repo.
Normally your project folder (your “working tree”) can only have one branch checked out at a time. A worktree creates a new, separate folder on your computer that acts as a second (or third, or fourth…) working tree. Each worktree can have a different branch checked out, but they all share the same underlying .git history and database.
By adding a worktree, you can:
- Create an entirely new folder linked to your project.
- Check out a new or existing branch in that isolated folder.
- Run an instance of Claude Code (or any tool) in each folder, letting them work in parallel without interference.
How to use it: A practical walkthrough
Let’s say you’re in your project folder yet-another-todo-app. You’ve asked your AI assistant to start refactoring the user authentication flow, but you don’t want to wait for it to finish before starting on the landing page.
Step 1: Create a new worktree
Run this command from your main project folder yet-another-todo-app
git worktree add ../todo-app-refactor -b refactor/landing-page mainLet’s break this down:
-
git worktree addthis is the base command to add a worktree -
../todo-app-refactorThis creates a new folder named todo-app-refactor alongside your current directory. This is your new, isolated workspace. -
-b refactor/landing-page: This tells Git to create a new branch namedrefactor/landing-pageinside the worktree -
main: This specifies that the new branch should be created from themainbranch.
Folder structure:
# Before
yet-another-todo-app/

# After
yet-another-todo-app/  (main branch)
todo-app-refactor/     (refactor/landing-page branch)
todo-app-bug-fixes/    (bug/auth-logout branch)
Step 2: Work in isolation
Now, navigate to your new workspace and let your AI assistant to work there
cd ../todo-app-refactor Here you can run Claude Code, or your preferred AI assistant. The changes done here are completely isolated to the refactor/landing-page branch.
Once done, commit and push like normal and merge via PR.
Note - Files like .env, node_modules or local config files (anything in .gitignore) will not be copied to your new worktrees. You will have to manually copy them
cp yet-another-todo-app/.env todo-app-refactor/This way, you can work on multiple things at once like debugging a production issue while developing a new feature or testing different AI approaches to the same problem.
Managing and Cleaning Up Your Worktrees
Your workspace can get cluttered if you don’t manage your worktrees.
List all Worktrees:
To see all active worktrees for your project, run:
git worktree listThis will show you the path to each worktree, its current commit HEAD, and the branch that’s checked out.
Remove a worktree:
Once your todo-app-refactor worktree has served it’s purpose, you should remove it to keep your workspace clean and save space.
# First, you might want to delete the branch if you've merged changes (optional but good practice)
git branch -d refactor/landing-page

# Then, remove the worktree
git worktree remove todo-app-refactor
⚠️ If there are uncommitted changes, Git won’t delete it. Either you can:
- Commit your changes
- Force remove (dangerous! See caution below)
git worktree remove --force /path/to/worktree⚠️ Use this with extreme care. This will forcefully delete the worktree causing loss of any uncommitted changes. Only use it if you are absolutely certain you don’t need the changes.
“Troubleshooting: If a worktree gets corrupted or you accidentally delete the folder: git worktree prune - removes references to deleted worktrees git worktree repair - fixes broken worktree references”
Branchlet - A CLI tool to create a manage worktrees
Branchlet is an interactive CLI tool with an easy to user interface which you can use to create and manage workrees.
It’s most notable features include ability to auto copy user specified files like env files to your new worktrees. This way you do not need to manually copy them. New worktrees would be instantly runnable.
Apart from copying files, you can also specify post creation commands such as npm install. Using such a tool makes managing multiple worktrees extremely easy.
Conclusion
git worktree is an excellent solution for working with multiple AI assistants.
With worktrees, you can have claude running in one terminal and gemini cli in another, sky is the limit! (or plan’s actual usage limits, whichever comes first 😀)
It’ll be like an army of developers working with you.